Hair balayage comes from the French words balai (broom) and bilayer (to sweep). Balayage is the sweeping or brushing motions when applying hair coloring in hair styling.
In the upcoming sections, take a closer look at what sets hair balayage apart—the art and science behind it—including the tools used in the making of this art, the hows of its application, troubleshooting, and aftercare.
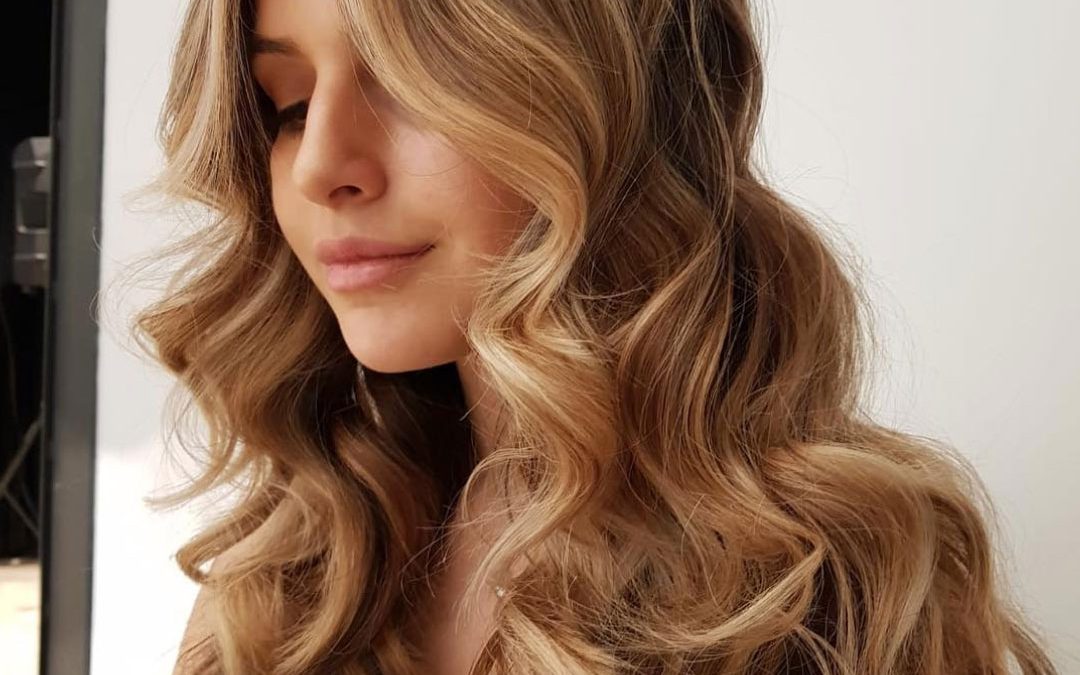
Hair Balayage > Other Techniques
Balayage is primarily a hair coloring technique rather than a specific style.
Dating back to the 1970s in France, hair balayage gained popularity for its ability to produce a low-maintenance, lived-in look. Unlike traditional foil highlighting, balayage grows out gracefully, requiring less upkeep. The gradual fading of color means no visible regrowth lines, giving you that effortlessly chic look even weeks after your salon visit.
It’s about tailoring color to suit the individual’s features, hair tone, skin tone, and personal style.
Tools of the Trade for Hair Balayage
Usually, flat or wide brushes and angled brushes are used for hair balayage application:
Flat brushes are the workhorses of hair balayage, allowing for smooth application of color. Suitable for covering larger sections of hair, these brushes help in creating broader highlights.
Angled brushes offer more control making them ideal for creating soft, natural-looking highlights and are great for painting near the roots.
Sectioning clips, partnered with fine-teethed sectioning combs, divide hair into sections that help color only certain parts. It’s like having an extra pair of hands holding the hair just where it’s needed.
For mixing bowls, those with a non-slip base and graduated measurements are recommended for accurate mixing of lightener and developer.
What’s a lightener and developer for?
Lighteners (bleach) are chemical agents that lighten the hair’s natural pigment. They break down the melanin molecules in the hair shaft which causes the hair to lighten or decolorize.
Developers (activators) are solutions used to activate the lightening process in conjunction with lighteners. They contain hydrogen peroxide and come in different strengths or volumes.
Hair balayage boards or paddles provide a stable surface for painting on color and can be used to support larger sections of hair.
Foil sheets and plastic wraps can be handy for isolating sections and controlling heat during processing. The latter especially allows for easy monitoring of color development.
For protective gear, gloves and an apron for the colorist, and a cape and towels to protect whose hair is being colored.

The Art and Science Behind Hair Balayage
Hair Texture: The Canvas
Imagine the hair as the canvas for a masterpiece. The texture dictates how color will interact and appear.
For those with fine hair, balayage can add dimension and a sense of fullness. The subtle strokes of color create an illusion of depth, enhancing the overall texture.
On the other hand, individuals blessed with thick hair have the advantage of showcasing bold and expressive hair balayage. The thickness allows for more color variation, resulting in a dynamic and vibrant finish. It’s like painting on a larger canvas; there’s more room to play with tones and shades.
Hair Type: The Play of Light
The science behind hair balayage lies in how it plays with light, and different hair types catch and reflect light in distinct ways. Straight hair tends to showcase color more prominently, emphasizing each stroke. The result is a sleek and polished appearance.
Wavy and curly hair, on the other hand, introduces a delightful element of unpredictability. Balayage on these textures creates a cascade of colors that move with the waves, offering a natural and carefree vibe. The key is adapting the technique to the unique patterns of each curl, ensuring a harmonious blend.
Prep for Hair Balayage
Assessing the hair’s natural color and desired outcome
Is the hair tone warm, cool, or neutral? Different hair colors have underlying pigments that can affect the way color behaves when lightened or colored. The underlying tone determines the appropriate lightener or color to select to achieve the desired result without unwanted brassiness or dullness.
Since hair balayage is a highly customizable hair coloring technique, it allows for endless variations in color placement and intensity. A seamless blend of color will look natural if the colorist understands the client’s natural hair color and undertones.
Note: Identify where the sun naturally hits the hair for a sun-kissed effect. Focus on areas around the face, the mid-lengths, and the ends to create dimension and depth.
By knowing what the client is envisioning and identifying their hair tone, you can anticipate how their hair is likely to respond to hair balayage techniques and adjust your approach accordingly.
Strand testing and avoiding potential issues
Now, strand testing is where the colorist gets to flex their expertise and make sure everything goes smoothly.
We start by selecting a small section of hair – preferably from underneath where it’s less noticeable – and apply the chosen lightener or color. Keep a close eye on how it develops, paying attention to factors like processing time and lift.
Then, carefully evaluate the results. Is the color lifting evenly? Are there any unexpected undertones popping up? Take note of any issues and make adjustments as needed before proceeding with the full hair balayage application.
Step-by-Step Guide to Applying Hair Balayage Highlights
The workstation must be clean and ready with all the necessary tools and products within reach. So should the hair be. Washing it before application is not necessary, but it is recommended to be clean and dry.
Section hair.
Prepare a high-quality lightener and developer mixture.
The choice of lightener depends on factors such as hair type, desired level of lift, and processing time. Developers come in different strengths or volumes. Lower volumes are suitable for subtle highlights or toning, while higher volumes are used for more dramatic color changes. The consistency of the mixture should be smooth for easy application.
Use a hair balayage brush with fine bristles for precise application. Hold it at a 45-degree angle and start painting the mixture onto the hair in sweeping motions. Use both horizontal and vertical strokes to create a natural and organic look. Feather the edges of the painted sections to avoid harsh lines.
It is possible to balayage rainbow colors onto hair if the hair is (made) light enough to achieve the desired color!
Keep a close eye on the processing time. Hair balayage often requires different processing times for various sections, so monitor each part individually to achieve consistent results.
After the processing time is complete, carefully rinse the lightener out of the hair with lukewarm water until the water runs clear.
Follow up with a gentle shampoo and conditioner to nourish and protect the hair.
Depending on the desired tone and level of lightness, you may choose to apply a toner to neutralize any unwanted brassiness and enhance the overall color result.
Gently towel-dry the hair before styling it. A hairdryer may be used, but use it on a low or medium heat setting. Be sure to apply heat protectant when using heat styling tools.
Addressing Common Challenges During the Application Process
Hair balayage, though stunning, comes with its own set of challenges. Here’s how to deal with common issues:
Uneven highlights
Cause: improper application techniques or insufficient saturation of the hair strands.
Solution: Identify the uneven sections and note the difference in lightening. Mix a fresh batch of lightener and reapply it with a fine-tipped brush to the areas needing correction.
Brassiness or unwanted warm tones
Cause: the underlying pigments in the hair are not effectively neutralized during the lightening process.
Solution: Choose a toner with the appropriate undertones to counteract the brassiness. Apply it evenly, focusing on areas with unwanted warmth. Leave it on for a certain period, then rinse.
Violet or blue toner is ideal for balancing out yellow or brassy tones in blonde or lightened hair. Gold toner adds warmth and golden tones to blonde or light brown hair. Ash toner produces cooler and ashier tones in blonde or lightened hair. Beige toner produces natural, balanced tones that are neither warm nor cool.
– “A Guide to Choosing Hair Toner for Highlights.” Clinikally. 06 Mar 2024.
Bleeding (blending of colors where they shouldn’t)
Cause: sections of hair overlap during application.
Solution: With a fine-tipped brush, carefully apply the fresh lightener only to the areas where bleeding needs correction. Remove the lightener once you have achieved the desired level. Rinse.
Overly lightened ends
Cause: Excessive product application on the ends or overlapping with previous highlights.
Solution: Mix a gloss or toner that matches the midshaft color and apply it to the over-lightened areas. Monitor closely to avoid over-toning then rinse once the color is balanced.
Harsh contrast or lines of demarcation
Cause: poor blending between the balayage sections and the natural hair color.
Solution: Blend the new mixture of a lower volume developer and lightener upwards towards the roots.
Hair Balayage Aftercare
Christopher Hanna is always available to help you touch up or maintain the allure of your hair balayage, but you also have to invest in the right products to keep your hair vibrant and healthy between appointments. Consider the following in selecting the best products for prolonged hair balayage brilliance:
- Opt for sulfate-free shampoos to prevent color stripping. Sulfates can be harsh on your hair and contribute to premature fading.
- Invest in a high-quality, color-protecting conditioner. Look for ingredients like UV filters and antioxidants to shield your hair from environmental damage and maintain color vibrancy.
- Treat your hair balayage to a weekly hydrating hair mask. Ingredients like argan oil, keratin, and shea butter can nourish and revitalize your locks, preventing dryness and breakage.
- Finish your shower with a cold water rinse. Cold water helps seal the hair cuticle, locking in moisture and color.
- Avoid excessive heat styling or minimize the use of hot styling tools. Excessive heat can accelerate hair balayage color fading. When styling is necessary, use a heat-protectant spray to shield your strands.
- Healthy hair holds color better. Schedule regular trims to eliminate split ends and maintain the overall health of your hair.
- If prolonged sun exposure is inevitable, consider using a UV-protectant spray to shield your hair from the harmful rays.
By combining diligent at-home care with regular salon visits, you can ensure that your hair balayage remains a stunning and enduring feature of your style.
From the meticulous selection of tools to the careful assessment of hair texture and type, every aspect of the process contributes to the final masterpiece. Balayage’s ability to seamlessly blend colors and create dimension makes it a favorite among clients seeking a low-maintenance yet sophisticated look.
Ultimately, hair balayage is more than just a hair coloring technique—it’s an art form that allows for endless creativity and personalization. Whether you’re a seasoned stylist or someone considering hair balayage for the first time, understanding the hows and whys behind this popular trend empowers you to achieve beautiful, customized results that enhance your natural features and reflect your unique style.